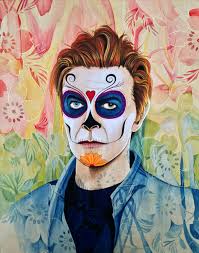
写在前面
前段时间的Prisma和最近的Ostagram着实火了一把,都是根据一张模版艺术图片进行神经网络学习将现实的照片达到艺术的效果。在关心这两个软件的同时,对后面的算法也很感兴趣,也非常感激Neural Style的作者Justin Johnson将其开源。但是在本机Mac搭建的过程中有遇到了不少问题,所以想着纪录下来,以供感兴趣的人参考。
搭建过程
安装 torch7
如果 MacOS 系统已经升级为 Sierra,我们需要手动安装 qt,否则会安装失败。参考 qt: fix building on Sierra and Xcode 8 by disabling phonon #5216 ,我们手动编辑’qt.rb’,键入’brew edit qt’,编辑参数增加’-no-phonon’项:
args << "-no-phonon" if MacOS.version >= :sierra
然后参考 torch 官网 的步骤。
git clone https://github.com/torch/distro.git ~/torch --recursive
cd ~/torch; bash install-deps;
./install.sh
其中,第二行安装 LuaJIT 和 Torch 需要的依赖项,如果 gnuplot 安装失败,则可能需要在 install-deps 脚本中注视掉’–with-wxmac’参数。第三行安装 LuaJIT、LuaRocks,然后使用 LuaRocks 安装 torch、nn 和 paths 等包。这里的安装过程会自动检测默认的 shell,并将 torch 添加到 PATH 中。完成后,我们在当前终端刷新环境变量:
# use bash
source ~/.bashrc
# use zsh
source ~/.zshrc
最后在当前终端键入 ‘th’ 检测 torch 是否安装成功:
  ______             __   |  Torch7
 /_  __/__  ________/ /   |  Scientific computing for Lua.
  / / / _ \/ __/ __/ _ \  |  Type ? for help
 /_/  \___/_/  \__/_//_/  |  https://github.com/torch
                          |  http://torch.ch

th>
显示以上信息后,就说明 torch 安装成果,然后键入 ‘exit’ 退出。
安装 loadcaffe
参考 loadcaffe GitHub repo,先安装依赖:
# in MacOS
brew install protobuf
# in Linux
sudo apt-get install libprotobuf-dev protobuf-compiler
然后键入’luarocks install loadcaffe’即可。
安装 neural-style
从算法作者GitHub仓库下载源码:
cd ~/
git clone https://github.com/jcjohnson/neural-style.git
cd neural-style
然后下载必需的Model:
sh models/download_models.sh
其中’vgg_normalised.caffemodel’和’VGG_ILSVRC_19_layers.caffemodel’比较大,需要网络较好的条件下,否则下载速度非常慢。
使用效果
一切就绪后就可以在 CPU 模式下使用:
th neural_style.lua -style_image <image.jpg> -content_image <image.jpg>
以下是我本机的效果图:

原图是:

模版图是:

更多使用方法可以参考wiki
安装可选项
如果显卡支持 CUDA,那么下载安装 CUDA-capable GPU from NVIDIA 和 cuDNN 就可以将一两个小时的运行时间大大缩短。
论文引用
如果论文研究可以参考以下格式进行引用:
@misc{Johnson2015,
    author = {Johnson, Justin},
    title = {neural-style},
    year = {2015},
    publisher = {GitHub},
    journal = {GitHub repository},
    howpublished = {\url{https://github.com/jcjohnson/neural-style}},
}